Day 1
Protein prep
Oven roasted pork shoulder is my meat of choice for tamales. The meat is heavily spiced and salted and roasted in the oven for several hours at 300 -325 degrees. One or two chopped onions, a few jalapenos, some tomatillo and garlic cloves go into the pan. Some of the veg goes under the meat to insulate it and some goes on top so the foil won't stick to the meat. I usually put a cup or two of chicken stock in the bottom of the roasting pan and loosely cover the pan with tin foil. This keeps the meat moist and prevents burning before the fat starts to render out. I'll turn the meat a couple of times during cooking. The last hour or so the meat is uncovered to allow the exterior to crisp up a little.
 |
| From The Hollow Leg Diner - images |
When the meat is tender it is taken out of the oven and allowed to rest and cool a little. When cool enough to handle I will start shredding up the meat. As it is shredded, I'll squeeze some lemon juice over it. I also separate most of the fat from the pan juices and strain out the veggies. If the veggies are crispy they'll get tossed. If the are still soft, they get mixed into the meat along with the pan juices. This keeps the meat moist and adds an incredible flavor. By the way; this is also how we make our carnitas. I'm not big on doing traditional carnitas anymore. I think I get more flavor and the meat is more tender when oven roasting.
In addition to the pork that I roasted I also had Lupe pick up a couple of roasted chickens from Costco. This is a cheap and easy way of making chicken tamales. The Costco chicken is super tender and well brined. all you need to do is mix it with a good chile sauce and you are ready to stuff some tamales.
 |
| From The Hollow Leg Diner - images |
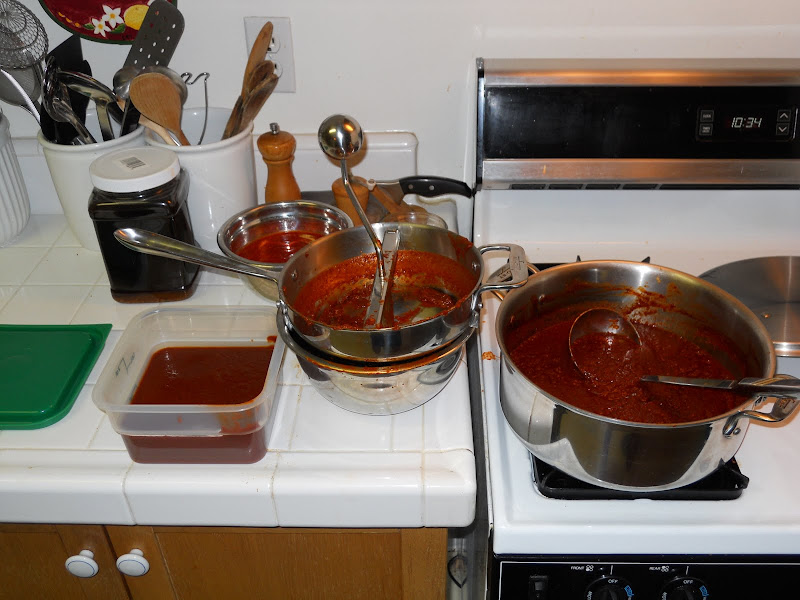
I start the sauce with a variety of chiles. This time I used a lot of Japones chile. In the past I used equal parts of California, New Mexico and guajillo along with some ancho, morita and d'arbol. The first three are sort of the base flavor. The ancho gives a sort of mellow heat, the morita adds smokiness and the d'arbol really gives it a kick. My wife and her family use d'arbol in everything and, up until recently, so did I. I've always thought that d'arbol had a somewhat harsh flavor. Lately I have used Japones instead of the d'arbol. If anything, the Japones are hotter, but it is a much smoother flavor. In this batch of chile sauce it was the japones as the dominant flavor. An added benefit is that the sauce was a much more vibrant red color than what I am used to. I start by simmering the chiles in chicken stock. After an hour or two the chiles are strained out of the stock and pureed in the blender with salt, onion, garlic and spices (oregano, marjoram, black pepper, clove and cinnamon). A variation on this would be to add the onion, garlic and spices to the stock. I would do this if I had to cook the chicken in the stock. Simmering the chicken in the chile-infused stock adds a lot of flavor. Since I had roasted chicken this time I omitted that step.
 |
| From The Hollow Leg Diner - images |
The chile puree is passed through the food mill to remove all the seeds. After that I heated lard in a heavy pot and then added the garlic-onion puree. When the puree started getting a little color the chile puree was added to the pot. Some of the chile-infused stock was added to the sauce to adjust for consistency. The sauce is simmered for at least 5 to 6 hours or until it starts to mellow. The long, slow simmer takes the harsh edge off the chiles and onion.
 |
| From The Hollow Leg Diner - images |
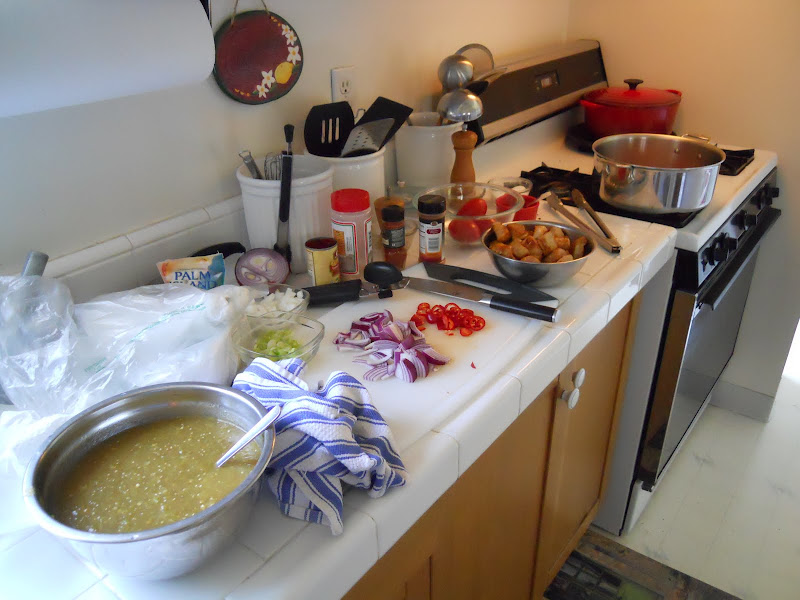
Since I am incapable of making just one type of tamale, I found myself making a chili verde sauce as well. I roasted a ton of jalapenos and tomatillos and then pureed them separately. I also pureed a couple of onions and a bunch of garlic with salt, pepper and spices (Cayenne pepper, oregano and marjoram). The onion-garlic mixture is cooked in some lard until it starts to brown. Then the pureed jalapenos are mixed in along with a bunch of cilantro. I then add the tomatillo puree until I get the right level of acidity. This sauce is also simmered for several hours.
 |
| From The Hollow Leg Diner - images |
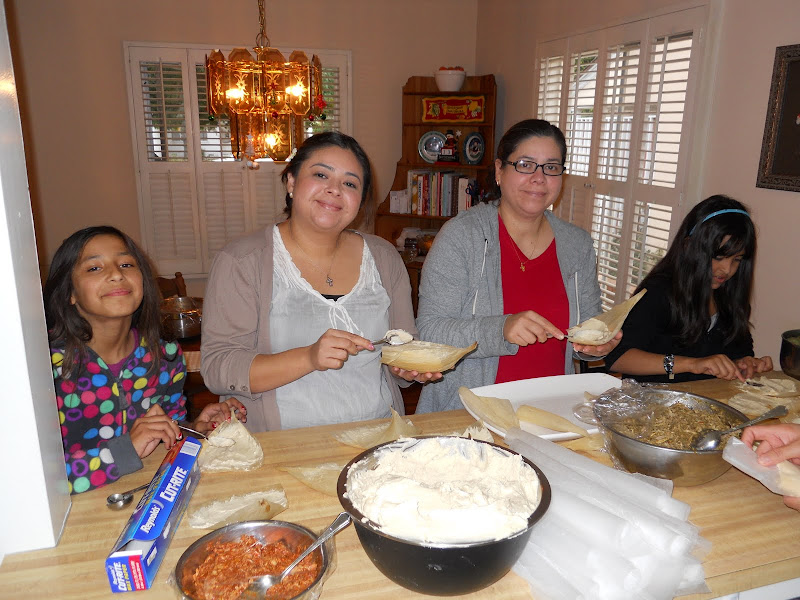
Assembly
Step 1 - Have your wife enlist the aid of all her sisters and nieces. It is important to have several family members willing to perform several hours of labor for free (we might pay them in tamales if they're really industrious ;-)
 |
| From The Hollow Leg Diner - images |
After soaking the corn husks in hot water for a while, it's time for assembly. The best method is to set up some sort of assembly order and assign tasks to each person (Tamale-Bot? A-tamal-aton?).
 |
| From The Hollow Leg Diner - images |
Into the steamer
 |
| From The Hollow Leg Diner - images |
 |
| From The Hollow Leg Diner - images |
 |
| From The Hollow Leg Diner - images |


No comments:
Post a Comment
Feel free to leave your comments. SPAM and annoying comments will be deleted. I'm in charge here, so no complaints.
Note: Only a member of this blog may post a comment.